If you’re a self-published author, you have the choice if you want to setup a Pre-order for your eBook.
This is something I’ve never done before. So figuring out how to setup a pre-order is my newest experiment.
Right now, I’m in the editing stage of my newest novel Longing for Love, so I thought this would be the perfect time to try to figure this out 😉
Since the Smashwords book distributor now offers ‘assetless preorders'(no book manuscript or cover required), this seemed like the perfect time to try this out.
Read on to learn the simple steps on how you can set up a pre-order for your ebook…
How to Setup ‘assetless’ ebook pre-orders on Smashwords
You can set up a pre-order for your ebook without uploading your manuscript or book cover.
Smashwords reports that books launched as pre-orders in the last year earned over triple the amount made by books uploaded on the day of release.
The only catch is that you need to have a ready-to-go book cover and manuscript uploaded to your Smashwords account(and therefore to digital retailers like Kobo, iBooks, Barnes & Noble, etc.), at least 10 business days prior to the release date that you set on your pre-order.
Mark Coker, the founder of Smashwords, says the two main benefits of pre-orders are: 1)to give authors more effective advanced marketing 2) to fast track the pre-ordered book to bestseller lists.
So if you’ve been thinking of setting up a pre-order with your next book release, you might find that the benefits are worth it.
Something to remember about Pre-orders…
On all digital retail stores EXCEPT Amazon, the preorders that are accrued are accredited to your launch. Most stores will credit the pre-order that was made on the day of release, and this will count towards your sales rank.
But, on Amazon the pre-orders don’t count toward your sales rank. So you might want to think twice before you setup your pre-order on Amazon. This is what I have done. I will be running pre-orders everywhere else, but will wait for the the launch date to put the book on Amazon 😉
A Simple Step-by-Step process of how to setup your pre-order on Smashwords
I thought I’d use screenshots, in hopes that you’ll find this easier to follow.
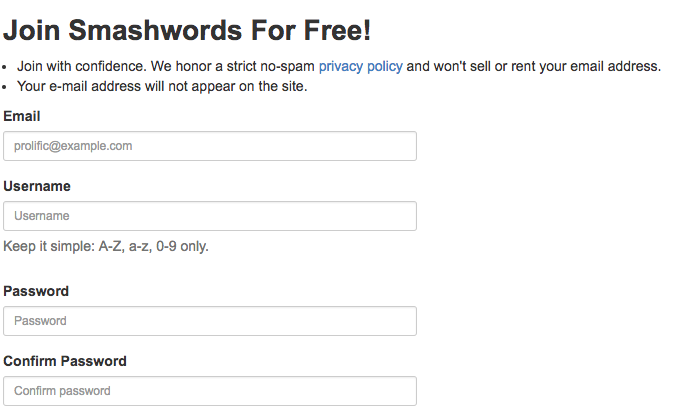
STEP 1: Head on over to the sign-up page to setup your account: https://www.smashwords.com/signup
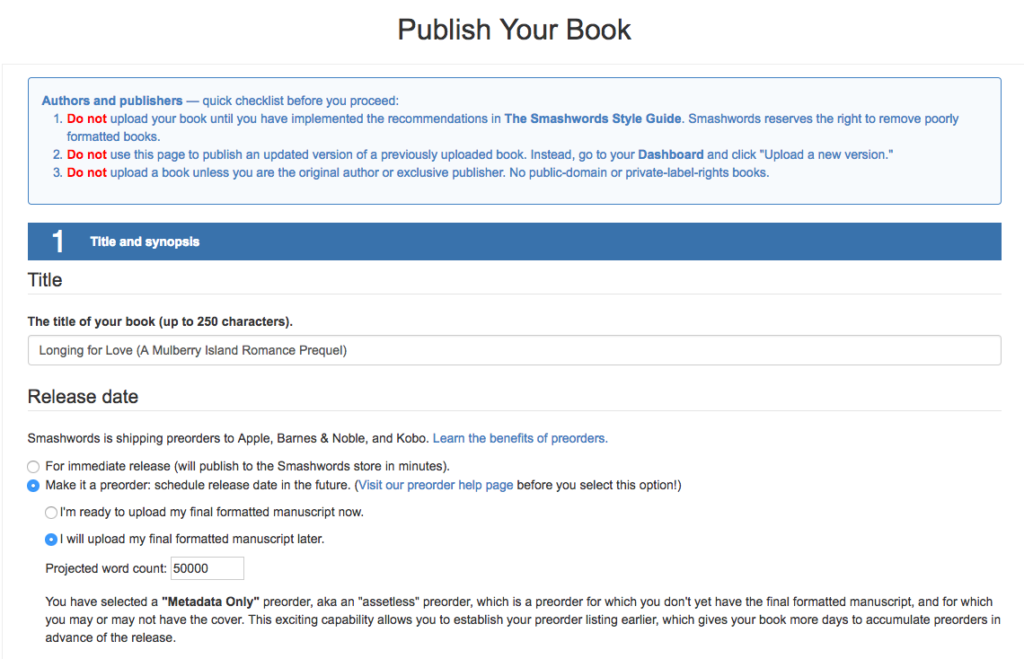
STEP 2: Go to the page where it says “Publish Your Book” which you can find at this link.
Here’s where you start to fill in the details of your book. You’ll need to know the title, description and what categories your book fits into.
In this part you can see below that I click the box which said to “make it a preorder” so that the book would be released sometime in the future. I also clicked the box that “I will upload my final formatted manuscript later.”
The “Projected word count”(even though I’m not quite finished editing the manuscript yet), I think will be around 50,000 words, so that’s what I’ve added.
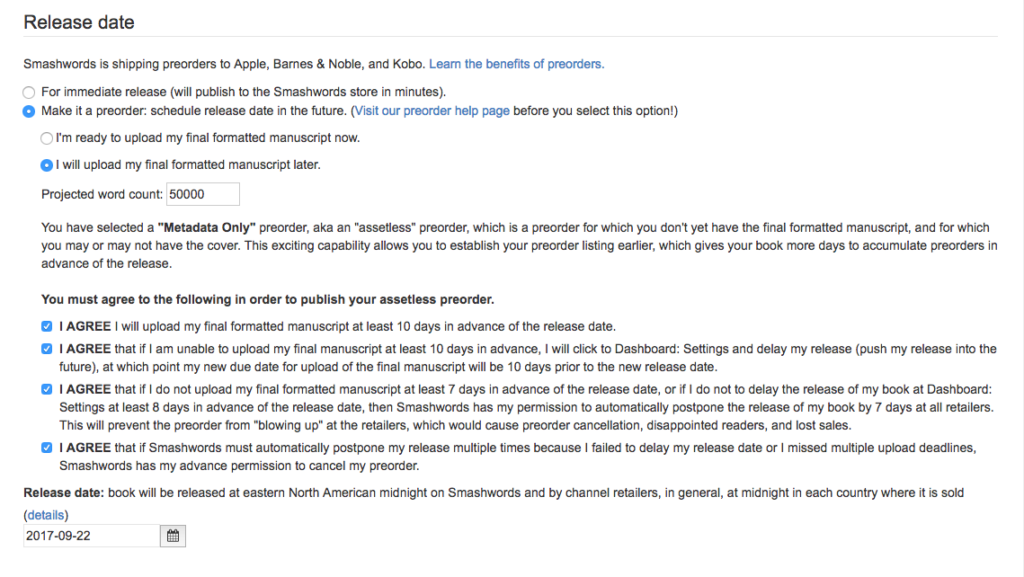
STEP 3: Click that you agree to the terms and conditions and then click on the calendar to set a release date for your pre-order.
This part is quite simple. You just click on “make it a preorder” and “I will upload my final formatted manuscript later.”
Also you’ll see below, that you need to click on all the “I Agree” buttons.
Then you set the release date for your pre-order. Just double check that you’re giving yourself enough time to upload your edited manuscript 10 business days before your scheduled pre-order release date 😉
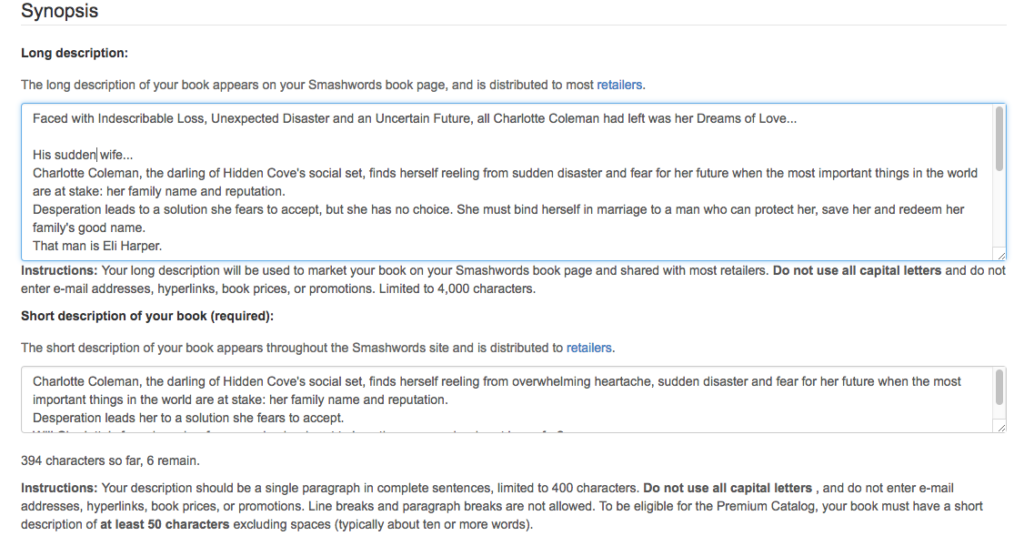
STEP 4: Write out a Long and a Short Description of Your Book
It takes a little time to write out a good description. Since this is a super important part of what potential readers see when they look at your book, it’s important to take the time to really write this well.
I found it helpful to browse through similar books in my genre, to get a feel for some great descriptions on some of the bestsellers on Amazon in my book’s genre. Maybe that will help you too.
STEP 5: Choose the language of your book and decide on the price.
Simply choose the language your book is written in. Next, choose what you want to do with the price. As you can see below, you can make your book free, let your readers determine the price or set your own price. For this book, I wanted to go with the lowest price point possible, so I went with .99 cents. I kind of like the graph they added to show you how the retail price divides up between you the author, Smashwords and any affiliates.

STEP 6: Choose if you want readers to have the option to read a small portion of your book for free.
I like to sample a new author’s book, before I decide to make a purchase. So offering a small percentage of the book for free, really makes sense to me. In this case I went with 10%.

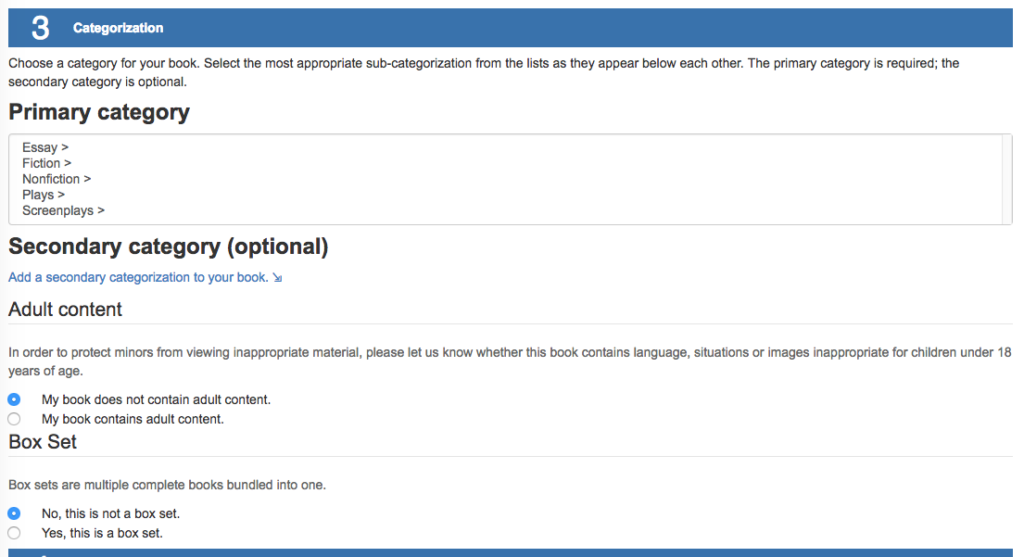
STEP 7: Choose your categories – both primary and secondary. Also click the appropriate links for adult content and whether you book is a stand alone or included in a box set.
For categories, sometimes it helps again to go to Amazon.com and look at bestselling books in your genre. Scroll down to the Product details and take a look at what categories are chosen for books that are similar to yours. By doing that, it can make the metadata process easier to figure out.
Then click the appropriate box – whether it’s adult content or not, and whether or not your book is in a boxset.
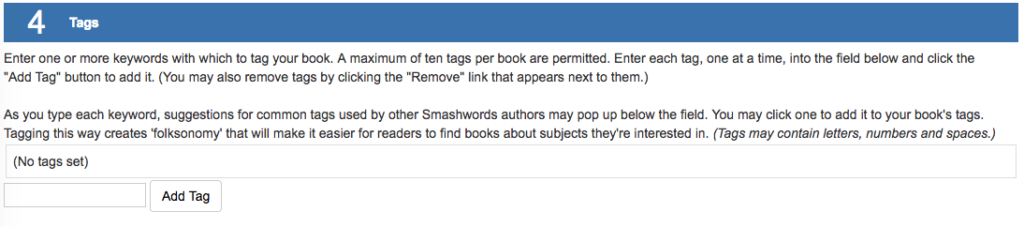
STEP 8: Add keywords for which to ‘tag’ your book.
This is pretty straightforward. Choose keywords that will really be helpful for new readers to find your book.
Sometimes it’s helpful again to go to Amazon to see what are some popular keywords for books similar to yours.
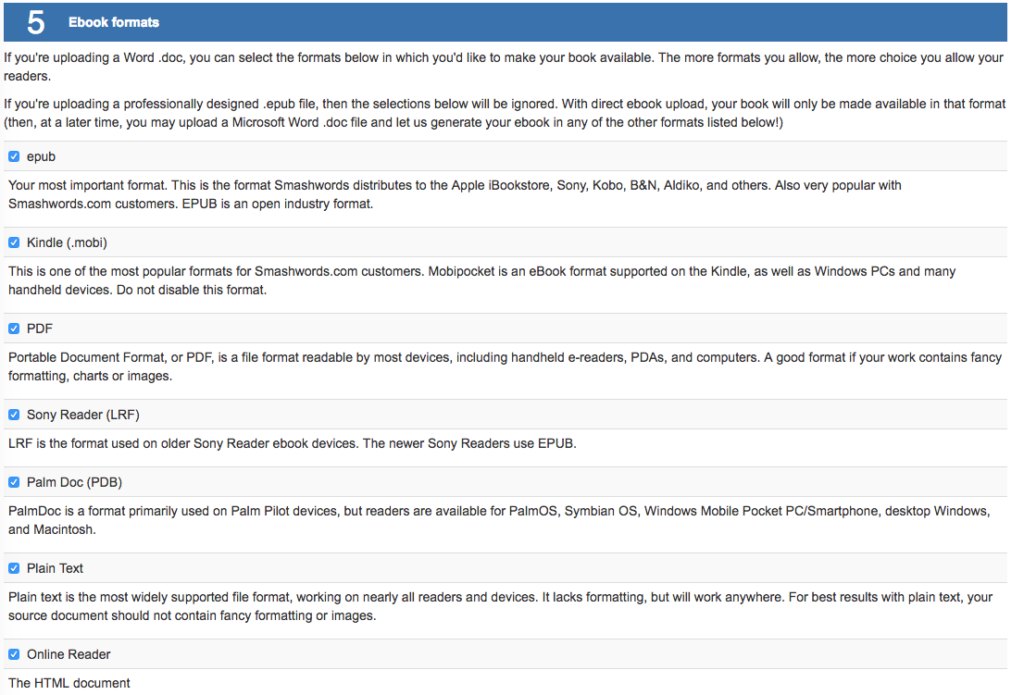
STEP 9: Choose the ebook formats you want to make available to readers.
If you allow more formats, then there will be more potential readers who can read your book.
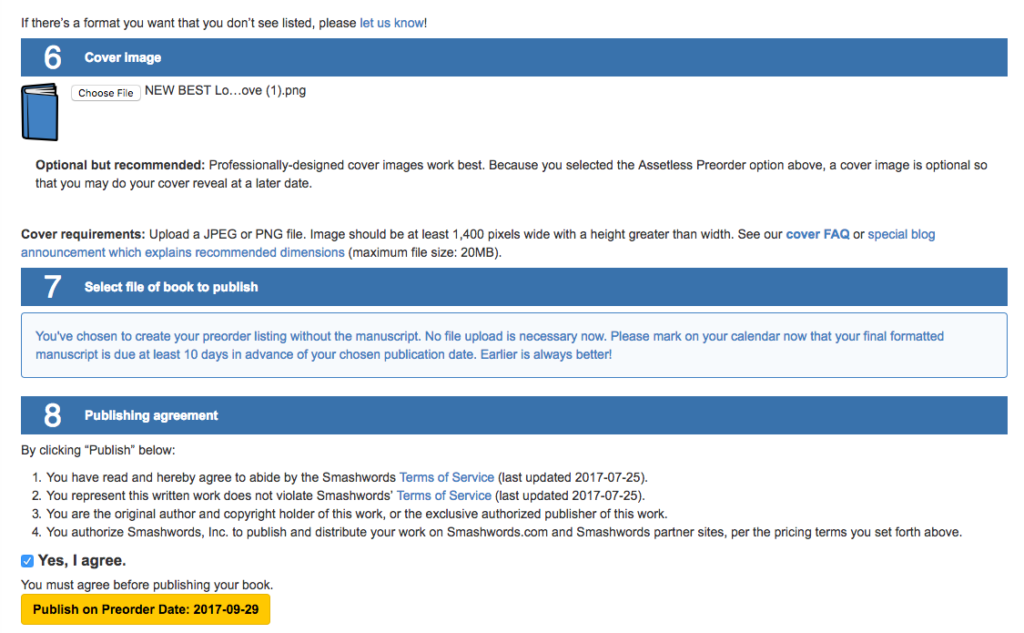
STEP 10: Upload a book cover(if you have one available) and then after you’ve agreed to the Publishing agreement, click the yellow box at the bottom of the page.
I added a book cover here that I made using Canva.com.
Since I don’t have my manuscript ready to go yet, I didn’t click on “select file of book to publish.” I’ve marked my calendar when I need to have the manuscript uploaded(earlier is better).
Then all you need to do is read through the publishing agreement and click “Yes, I agree” and then you click on the yellow box which says “Publish on Preorder Date______”.
STEP 11: Go to your dashboard and preview your book cover and description and see if you need to make any changes.
Double check that the details are correct: book cover; title; your author name; description; the pre-order date that you’ve set; the price of the book, etc. These are important details to double check.
Then when you’re happy with what you see, click on “dashboard” to double check that it’s been added to your “book summaries” area. And that’s it!

You can see the book is now at iBooks, Kobo and Barnes & Noble, but it’s still waiting to be distributed to the rest of the digital retailers & libraries. Also, this prequel to the Mulberry Island Romance series, will be available on Amazon at the end of September.
That was pretty simple to figure out right?
I hope you found that helpful as you self-publish your own books. Consider setting up your own pre-order for your work in progress and see if that helps more readers find you and your books!
Have you self-published your books using pre-orders before? Please do share your thoughts and ideas in the comments. We can all learn from each other 😉